
Custom Patches Australia: To Know How Are They Made?
What if we tell you that you can turn a simple piece of fabric into a colourful badge for your jacket, backpack, cap, or uniform? Yes, you heard that right!
It might look like a small accessory. But remember that creating a custom patch involves several important steps. You need to not only choose the right materials and finalise the design but also add the finishing touches.
Custom badges are popular for personalising clothing, identifying teams, displaying logos, and creating unique designs. However, how are custom badges made, and what materials are needed to create them?
Well, the answer actually depends on the patch style you choose.
Let’s understand how custom badges are actually made in Australia.
What Do You Need to Know About Custom Patches? An Overview
Custom patches Australia are basically personalised badges. They are made from materials such as fabric, thread, leather, or flexible PVC.
On top of that, these badges can display not only names and logos but also artwork and other designs.
You can use them on uniforms, jackets, hats, bags, workwear, and sports clothing. They are also useful for clubs, community organisations, and businesses that want a consistent visual identity.
But don’t forget that not every custom patch is manufactured the same way. The material and production method actually depend on the design, intended use, and finish you want.
Types of Custom Patches
These are the most common types of custom badges.
Embroidered Patches
These badges actually use coloured threads stitched onto a fabric base. Their raised texture gives them a traditional appearance that works well for logos, names, and uniforms.
Woven Patches
Besides that, these woven badges are created by weaving fine threads together. Their relatively smooth surface makes them suitable for small lettering and intricate designs.
Printed Patches
Printed badges basically feature printed artwork. This makes them ideal not only for colourful graphics and detailed illustrations but also for gradient designs.
PVC Patches
These are made from flexible synthetic material moulded into a particular shape. They can create raised details and distinct colour sections.
Chenille Patches
Chenille badges, on the other hand, have a soft and textured appearance that is often associated with varsity jackets and decorative lettering.
Leather Patches
These provide a distinctive finish for caps, bags, jackets, and selected clothing items. You can choose between pure and faux leather based on your preferences.
You must keep in mind that each type has its own production requirements. For instance, an embroidered emblems needs stitching equipment. A PVC badge, on the flip side, requires a suitable moulding process.
What Are the Materials and Tools Needed for Custom Patch Making?
Now that you understand the different badge types, let’s look at the materials and tools involved in making them.
The exact requirements basically depend on whether you want to make patches at home or manufacture them with specialised equipment.
You can make some fabric badges with basic sewing supplies. However, professional production may require embroidery machines, printing equipment, or moulding tools.
Essential Materials for Making Custom Patches
Here are the main materials used to make patches.
| Material | Purpose | Best suited for |
| Fabric or Twill | Provides a base for stitching | Embroidered patches |
| Coloured Threads | Create designs through stitching | Embroidered patches |
| Fine Weaving Threads | Produce detailed designs with a smooth finish | Woven patches |
| Printing Materials | Transfer artwork onto a suitable surface | Printed patches |
| PVC Material | Forms flexible moulded designs | PVC patches |
| Leather | Creates a distinctive surface for custom designs | Leather patches |
| Backing Material | Helps attach the patch to clothing or equipment | Sew-on, iron-on, and Velcro patches |
However, you don’t need every material for every project. You need fabric and thread to make an embroidered patch. Alternatively, creating a PVC patch involves moulding the material into the desired shape.
Tools You Need
You also need a few tools for patch making. These tools will actually depend on the manufacturing method.
For basic fabric badges, you may need
- A needle and embroidery thread
- Fabric scissors for cutting the material
- An embroidery hoop to stretch the fabric
- A pencil or fabric marker to outline the design
- A ruler to measure the patch
- A sewing machine for stitching and attaching badges
- An iron for applying suitable heat-activated backing
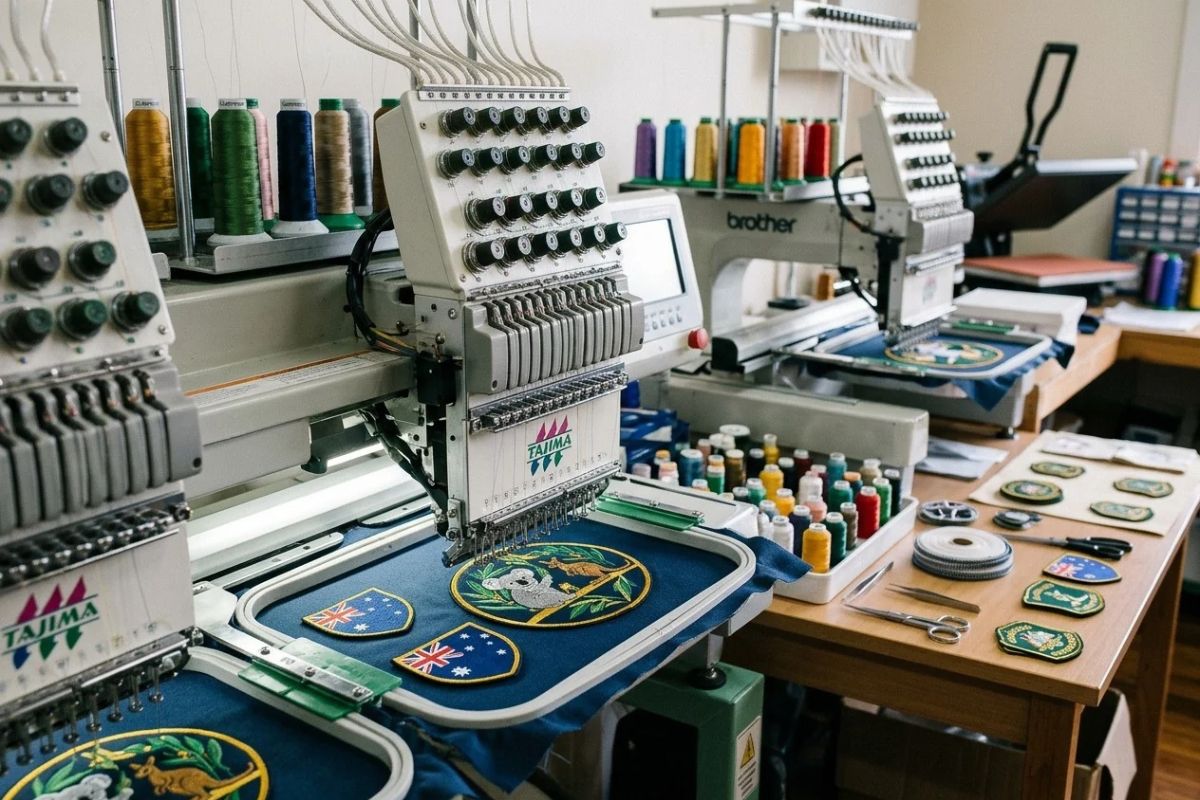
Specialised equipment for professional production may include not only embroidery machines and printing equipment but also cutting tools and PVC moulding machinery.
Remember that PVC moulding and industrial embroidery are not simple home projects. Professional manufacturing equipment may be more practical if you want a highly detailed finish or need many identical patches.
How Can You Make Custom Patches? Step by Step
But the question is, how can you even make custom patches?
You just have to follow a few steps, including not only creating your patch design and picking the right material but also preparing the artwork for production and producing the patch.
In addition to this, make sure that you add the right backing and inspect the finished patch.
Create Your Patch Design
You may not know this, but every great patch begins with an idea. You can think about what you want your patch to communicate. Is it a team emblem, a company logo, a name badge, or a decorative design for your favourite jacket?
Once you have an idea, you can simply create a digital design.
You must choose not only your colours and lettering but also symbols and overall shape. You should also consider the size of the patch and where you plan to attach it.
Make sure that your design is clear and readable. This is because too many tiny details can become difficult to reproduce, especially in embroidered badges.
Choose the Right Material
Once your design is ready, you have to select a suitable material. For example, if you are preparing metal band patches, then you first have to choose the right material.
You can opt for an embroidered fabric for a classic textured appearance. However, woven material might be an ideal choice if your artwork contains fine lines and small letters.
On top of that, printed badges can reproduce complex artwork. And PVC badges are useful when you want a flexible design with raised details.
Prepare the Artwork for Production
You need to adapt your digital design to the selected production method. For embroidery, you can simply convert the artwork into stitch instructions. On the other hand, you have to prepare for the printing process if you want to create a printed badge.
Besides that, PVC production requires a design suitable for moulding.
At this stage, you should carefully check not only the badge’s dimensions and colours but also the lettering and borders.
Produce the Patch
This is where the design starts becoming a physical product. The production method depends on the patch type.
For embroidered badges, a machine basically stitches coloured threads onto a fabric base. Different thread colours create the design, while the stitching pattern determines its texture and appearance.
Furthermore, fine threads are woven together to reproduce the artwork for woven badges. This method can create a relatively flat finish with clear lettering and detailed lines.
In addition to this, you have to transfer the artwork onto an appropriate surface using a suitable printing technique for printed badges.
For PVC badges, the material is moulded into the required shape. The mould helps form the design, including raised sections and separate colour areas.
Add the Right Backing
But how will you attach your badge to clothing or equipment? You have to add the right backing.
You generally have three common choices.
Sew-On Backing
You attach the badge with a needle and thread or a sewing machine. It is a practical choice for uniforms, jackets, and workwear.
Iron-On Backing
Heat activates the adhesive on the back of the badge. This basically allows it to bond with suitable fabric.
Velcro Backing
A hook-and-loop fastening system allows you to remove and replace the patch when needed.
Choose your backing based not only on the fabric and intended use but also on how often you’ll remove or wash the patch.
However, you must always follow the manufacturer’s application instructions for iron-on patches.
Inspect the Finished Patch
Finally, inspect the patch before using it. Check not only the stitching and lettering but also the borders and shape of the patch.
You should also look for loose threads, uneven edges, and other visible defects.
What Do Readers Usually Ask?
What is the best material for custom badges?
There is actually no single best material for every design. This is because the best material for custom badges depends on your specific design and usage needs. However, the top choices include not only embroidery and PVC but also leather.
How long does it take to make custom badges?
It takes 2 to 4 weeks (roughly 10 to 25 business days) to design, produce, and deliver custom patches. Production time actually depends not only on the patch type and design complexity but also on the order quantity and manufacturing method.
What are the steps to make custom badges?
To make custom badges, you must first create your patch design and choose the right material. Then you should not only prepare the artwork for production and produce the patch, but also add the right backing and inspect the finished patch.
Wrapping Up!
Custom badges are personalised pieces of fabric, vinyl, leather, or rubber. They can have not only a unique design and logo but also text and artwork.
However, you must keep in mind that embroidery creates a traditional textured appearance and weaving supports fine details. On the other hand, printing reproduces complex artwork, and PVC moulding creates distinctive raised designs.
You have to pick the material and tools based on your preferences.
To create these badges, you need to design your patch and choose the right material. Besides that, you should not only prepare the artwork for production and produce the patch, but also add the right backing and inspect the finished patch.

As the author of australiapatches.com.au, I provide useful information about patches, printed, embroidered, and PVC patches, as well as market trends and practical uses. With a hands-on approach and an Aussie perspective, I help readers choose quality solutions, understand materials, and navigate suppliers with confidence, clarity, and honest advice. Tailored guidance for Australian companies and artists.