
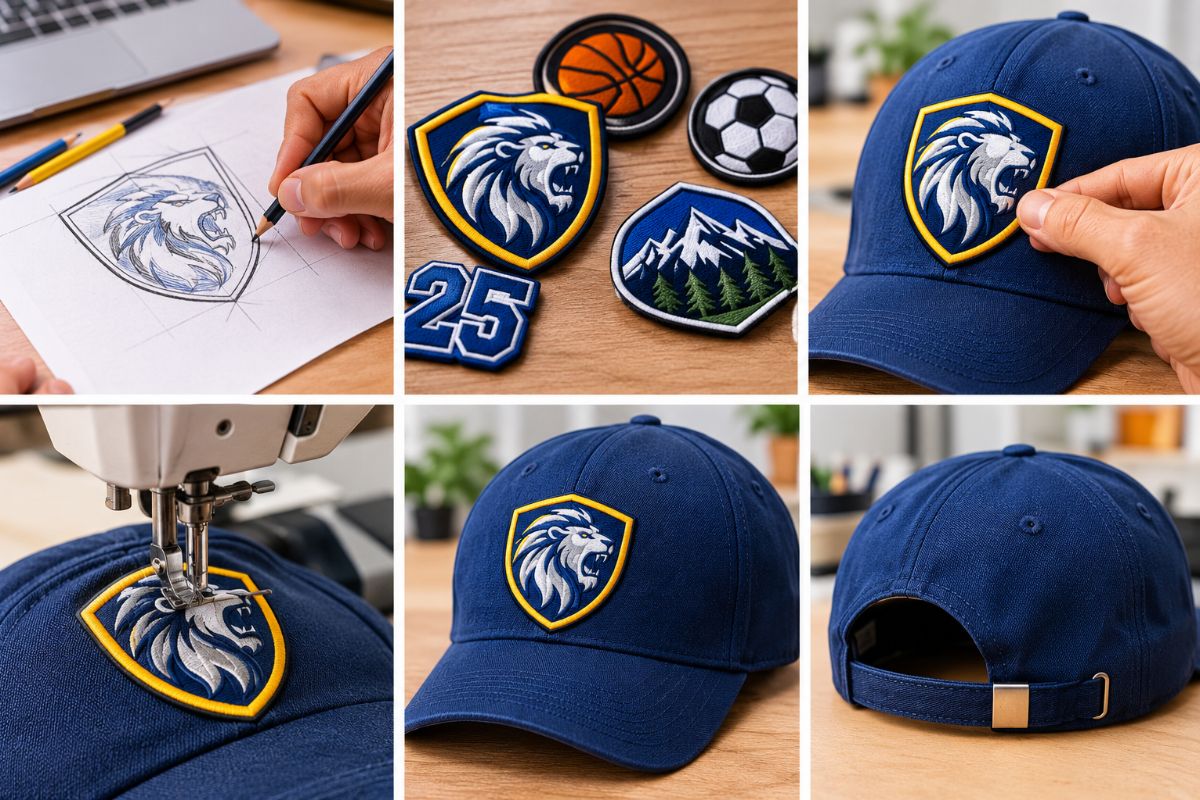
Custom Patches for Sportswear Caps: Design, Materials and Attachment Tips
A sports cap can do more than keep the sun out of your eyes. It can also display a team logo, player number or a design that members recognise straight away, for sporting clubs, school teams and community groups. Custom patches offer a practical way to add these details without redesigning the entire cap.
The process starts with a suitable design and the right patch material. You also need to consider the cap’s fabric, shape and how often it will be worn as getting these details right helps create a finish that looks professional and holds up during matches and everyday use.
Continue reading to know how you can create a custom patch to elevate the look of your sports cap.
What You Need To Know Before Designing Custom Patches For Your Caps
Adding custom sew on patches to your caps is one of the simplest ways to represent your team and boost team spirit instantly.
- A well-designed patch can easily help you recognise your team members on the field and prevent confusion related to identification.
- Not only that, a patch attached to your cap offers the extra benefit of durability as well.
Also, think of your hat that undergoes heavy sweating and frequent washing.
Printing techniques and direct stitching would rarely survive these conditions, resulting in a cap that looks unprofessional and messy.
But with a custom patch? You don’t have to worry about the durability concerns and motivation levels of your team players.
Here is how you can design your patch the right way.
Choose a Design That Suits Your Team
Before making a patch, you need to decide what it needs to represent. A club logo, mascot, initials or championship emblem can all work well when the design remains clear at a small size.
Keep these tips in your mind:
- Avoid squeezing too much text into the patch as fine lines and tiny lettering can become difficult to read, particularly when embroidery is used.
- Bold shapes, simple lettering and a limited colour palette usually work better on sports caps.
- Consider where the patch will sit, too. A front panel can handle a larger emblem, while a side panel may suit a smaller badge or player number.
A better option will be to sketch a few options and check how each one looks against the cap’s colour.
Pick a Suitable Cap
Caps are constructed in a different manner. Some have firm front panels, while others use soft fabric or mesh that can stretch and move.
- Structured caps generally provide a stable surface for a patch, making it easier to position the design neatly.
- Lightweight running caps often require a smaller, more flexible patch so the front does not become stiff or uncomfortable.
Check the fabric care instructions before choosing an attachment method. Heat-sensitive materials, coated fabrics and some synthetic blends may not tolerate high temperatures. If you are ordering caps for a whole team, test the design on the actual cap style before committing to a large quantity.
Select the Right Patch Material
The material affects the patch’s appearance, flexibility and durability. Your choice should suit the team’s needs as well as the cap itself.
- Embroidered patches: These have a textured finish created with stitched thread. They work well for bold logos, initials and traditional sporting designs.
- Woven patches: This type uses finer threads to replicate smaller details and lettering more clearly.
- PVC patches: They are made from flexible synthetic material and can create a raised, modern look and are useful for certain outdoor or performance-focused designs.
- Printed patches: These allow gradients, photographs and detailed artwork that may be difficult to reproduce with stitching.
For teams that want a classic stitched emblem, custom embroidered hats can provide a useful source of inspiration for matching the patch design with the cap’s overall look.
Prepare the Patch and Cap
Preparation is going to help prevent crooked placement and uneven edges.
- First, clean the cap according to its care instructions and allow it to dry completely. Remove loose threads or lint from the area where the patch will sit.
- Position the patch on the cap and use removable fabric markers or pins, where appropriate, to hold it in place.
- Step back and check that it is centred and aligned with the cap’s seams. A patch that looks straight on a table may appear crooked when the cap is worn.
- Create a simple placement guide showing the distance from the brim and side seam for team orders.
This makes it easier to keep every cap consistent.
Decide How to Attach the Patch
The attachment method is going to affect both the finished appearance and how well the patch stays in place.
Sew-On Techniques
Sew-on patches are attached with stitching around the edge . This method can offer a secure finish for caps that will be worn regularly during training and outdoor activities.
Hook and Loop Designs
Hook-and-loop patches can be removed and replaced, making them useful for teams that rotate names, roles or event designs. The cap needs a compatible attachment panel.
The Iron-On Method
Custom iron-on patches have a heat-activated adhesive backing. When the cap fabric is suitable, they can be a convenient option for smaller orders or straightforward designs.
But you need to know that the curved shape of a cap can make even pressure difficult to achieve, so follow the manufacturer’s instructions and check whether the patch is specifically suitable for headwear. Many caps also contain materials that cannot safely withstand the required heat.
Attach the Patch Carefully
Attachment requires another part of your attention.
For Sew-on Design
Use thread that matches the patch border. A curved needle can make the stitching easier around the front panel, depending on the cap’s construction. Keep the stitches even and secure the thread without pulling the fabric out of shape.
For Heat-Applied Patch
Start by reading the manufacturer’s temperature and pressing instructions. You can also use a suitable pressing surface that supports the cap, and avoid applying heat directly to plastic components or unsuitable synthetic materials.
Professional attachment can be a very safe choice if the details of the patch make the application difficult.
Inspect the edges and check that the custom iron on patches are secure once they are fitted. Avoid aggressive pulling that could damage your cap or the stitching around it.
Test the Finished Cap
Follow the care instructions for both the cap and patch, as some designs may require hand cleaning rather than machine washing.
Also make sure to:
- Inspect a sample for loose threads, lifted corners, uneven placement and colour differences before distributing the caps.
- Wear the cap for a short period to check that the patch does not make the front panel uncomfortable or too rigid.
- If the caps will be used for outdoor sport, consider exposure to sweat, sunlight, washing and repeated wear.
FAQS
Can patches be added to curved sports caps?
You can attach patches anywhere after you choose a patch size and attachment method that work with the cap’s shape. Smaller and flexible designs are often easier to fit neatly than large patches.
Are patches suitable for caps worn during outdoor training?
They can be, provided the material and attachment are suitable for the conditions. Consider sweat, sunlight, frequent wear and cleaning requirements before selecting a patch.
Can a patch be removed and replaced later?
Some can. Hook-and-loop designs are made for easy changes, while sewn patches can usually be removed with careful unpicking. Removing a heat-applied patch can leave adhesive residue and even damage the fabric.
Final Word
Choosing a logo is only the first step of creating custom patches for sportswear because the process also involves a few key choices that are going to affect the final results. The design material you choose, cap fabric and the preferred attachment method- everything is going to affect the final result. So always test the placement and finish before producing a full team order to create something that looks consistent and also represents your team well.

As the author of australiapatches.com.au, I provide useful information about patches, printed, embroidered, and PVC patches, as well as market trends and practical uses. With a hands-on approach and an Aussie perspective, I help readers choose quality solutions, understand materials, and navigate suppliers with confidence, clarity, and honest advice. Tailored guidance for Australian companies and artists.